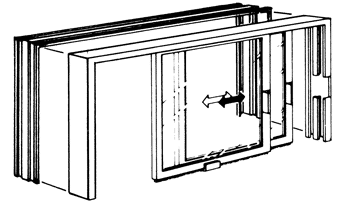
Place complete frame and window assembly on counter between mullions. Attach to mullions by concealed screws through channel walls.
Surround Detail: If window frame must be sealed into wall opening, an optional Surround Frame is available on special order that provides easy installation and removal of the complete window assembly for servicing. Mullions and counters by others.
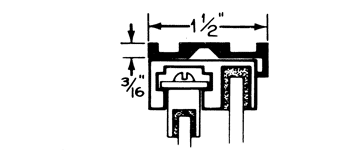
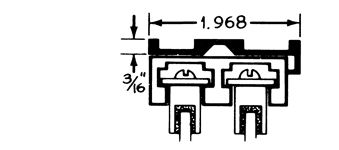
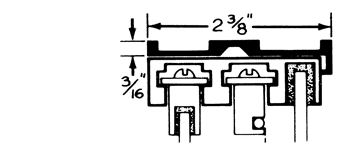
Removable Sash Channel: A special removable frame is available on special order for Series C & BP window.
Typical Surround Frame Detail
Special Removable Sash Channel
Installation Guide for Horizontal Sliding Windows

The following guidelines will ensure smooth, trouble-free operation…
- Due to vibration during transit, we suggest that the screws be re-tightened.
- Bench test this window before installing.
- When installing, be certain that the window is perfectly plumb, and straight. Be certain that the opening that will receive the window is also plumb and straight. REMOVE SHIPPING STRAP BEFORE INSTALLATION OF HORIZONTAL SLIDING
WINDOWS.
- Be certain that there is no excess weight or protrusions on the header above the window.
- Be certain that the sliding portion of this window tracks straight and true.
- When installing mounting screws, be certain that, FLAT-HEAD COUNTER-SUNK SCREWS are used, and are installed below flush into the aluminum frame. Failing to do so will cause interference with the sliding window operation.
- Before final tightening of the mounting screws, check the window operation. After tightening, recheck the operation of the window for smoothness.
- After installation, check the operation of the sliding bolt locks and/or screw locks. The sliding bolt lock must drop firmly into the milled slot at the bottom and/or top of the window. When this lock is fully locked, the lock knob will fall into its seat. If caulking or dirt is allowed to build up during installation, this lock will not operate correctly.
- As this window is top hung, a DRY lubricant may be sprayed into the top header for smoothness.
- Due to additional thickness of baked enamel paint, powder coat paint and Kynar finishes, sliding operation of windows may be hampered. Additional curing time may be required for special finishes.
Printable Horizontal Sliding Window Installation Instructions
Installation Guide for Vertical Sliding Windows

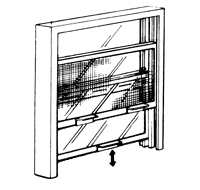
The following suggestions will insure smooth, trouble-free operation…
- Due to vibration during transit, we suggest that the screws be re-tightened.
- Bench test the window before installing.
- When installing, be certain that the window is perfectly plumb, and straight. Be certain that the opening that will receive the window is also plumb and straight. REMOVE SHIPPING STRAP BEFORE INSTALLATION
Be certain that all aluminum parts are aligned, square and straight. Warped or bent glass will not allow the sliding unit to function properly.
- Be certain that the sliding portion of the window tracks straight and true.
- Be certain that there are no protrusions in the rough opening.
- When installing mounting screws, be certain that, FLAT-HEAD COUNTER-SUNK SCREWS are used, and are installed below flush into the aluminum frame. Failing to do so will cause interference with the sliding window operation.
- Before final tightening of the mounting screws, check the window operation. After tightening, recheck the operation of the window for smoothness.
- After installation, check the operation of the sliding bolt locks and/or screw locks. The sliding bolt lock must drop firmly into the milled slot at the bottom and/or top of the window. When the lock is fully locked, the lock knob will fall into its seat. If mastic, caulking or dirt is allowed to build up during installation, the locks will not operate correctly.
- The slider tension is controlled by a series of compression springs mounted on both sides of the sash. Simply add or decrease the number of springs to allow the sash to operate to your satisfaction.
- DO NOT LUBRICATE THE SLIDER CHANNEL. This will interfere with the ability of the sliding window to stay open.
Printable Vertical Sliding Window Installation Instructions
